How to: Install Team Foundation Server Using the Advanced Configuration
If you want to change the default installation options for Team Foundation Server, use the advanced configuration, which lets you configure Team Foundation Server on multiple servers and change many other options.
Why use advanced? The standard installation might not fit your needs. You might want to customize a single server installation or install Team Foundation Server and its configuration database on different servers. Perhaps you already have SQL Server or SharePoint Products running in your organization and you'd like to use one of these installations to host team projects or the data for Team Foundation Server. If you use the optional features that require prerequisite server software, these installations can also be hosted on different servers. If you use multiple servers, you can distribute the load between Team Foundation Server and the configuration database, or you can ensure that prerequisite server software for features such as reporting or the portal site is running on capable hardware.
System Requirement
You can install Team Foundation Server on a server that is running one of the following operating systems:
Server operating systems:
- 64-bit version of Windows Server 2008 with SP2
- 64-bit versions of Windows Server 2008 R2 ¹ with SP1
- 64-bit versions of Windows Server 2012
IIS Requirement
IIS should be configured on Windows Server machine
IIS should be configured on Windows Server machine
SQL Server Requirements for Team Foundation Server
Supported editions
|
|
Required for Team Foundation Server
|
|
Accounts Required for Installation of Team Foundation Server
Component
|
Sample user logon name
|
Requirements
|
Team Foundation Server
|
TFSSERVICE
|
You can specify a built-in account or a user account. If you specify a user account, it must have the Log on as service permission.
You must not use the account that you use to install Team Foundation Server as the account for TFSSERVICE.
|
Team Foundation Build
|
TFSBUILD
|
You can specify a built-in account or a user account. If you use a user account, it must have the Log on as a service permission.
|
Team Foundation Server Proxy
|
TFSPROXY
|
You can specify a built-in account or a user account. If you use a user account, it must have the Log on as a service permission.
|
Reporting
|
TFSREPORTS
|
You must specify a user account that has the Allow log on locally permission.
Default: You are prompted for this account. You cannot use a built-in account for the report reader account.
|
SharePoint Products
|
WSSSERVICE
|
You must specify a user account.
Default: If you install Team Foundation Server with the default options, the account that you specified as the report reader account is also used for this account.
|
The Steps for IIS are for understanding. In Reality starting with TFS 2012 you dont need to configure IIS manually. TFS installation takes care of this step
Configure IIS 7.0 on Windows Server 2008 R2
Select Server manager and Web Server Role to Configure IIS
![clip_image002[4] clip_image002[4]](https://gwb.blob.core.windows.net/gauravtfs/Windows-Live-Writer/464d72afe193_D06F/clip_image0024_thumb.jpg)
Select Server manager and Web Server Role to Configure IIS
![clip_image002[4] clip_image002[4]](https://gwb.blob.core.windows.net/gauravtfs/Windows-Live-Writer/464d72afe193_D06F/clip_image0024_thumb.jpg)
Select asp.net and IIS 6 Management compatibility from the Role services Option
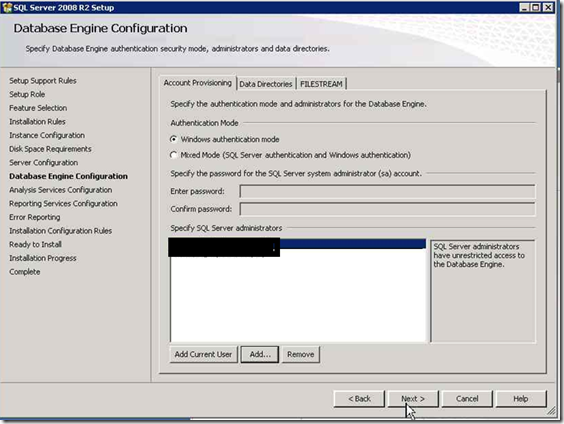
SQL Server 2008 R2 Installation with SP2
We need Database Engine Services and Full Text Search Feature for TFS installation
For Reporting Services We could select Report service and Analysis Service. Client Connecting tools Connectivity with SQL Management tools are important for tool like SQL Management Studio.
Important: If SQL administrator is not specified below than SQL will get looked and had to be used with SA login to update information.
For TFS 2012 with SQL Server 2008 R2 SP1 with Cumulative update 1 is mandatory, I have installed SQL SP2 to meet TFS requirement
Follow the wizard and complete the SQL server 2008 R2 SP1 Installation.
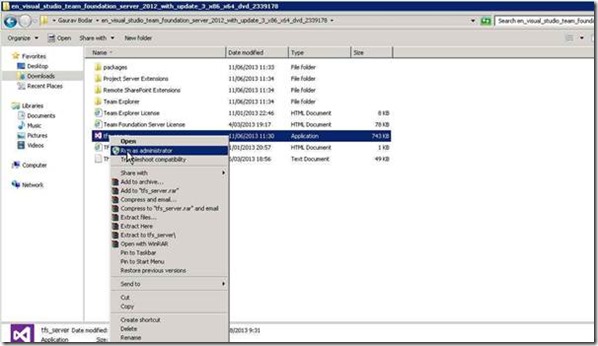
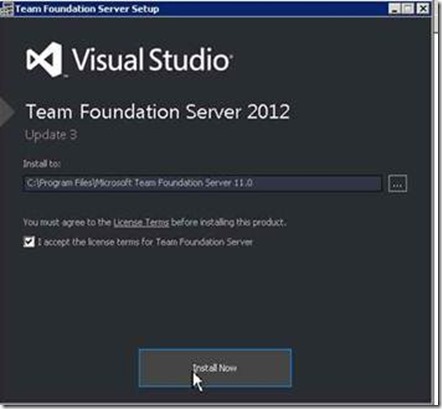
TFS 2012 Installation and Configuration
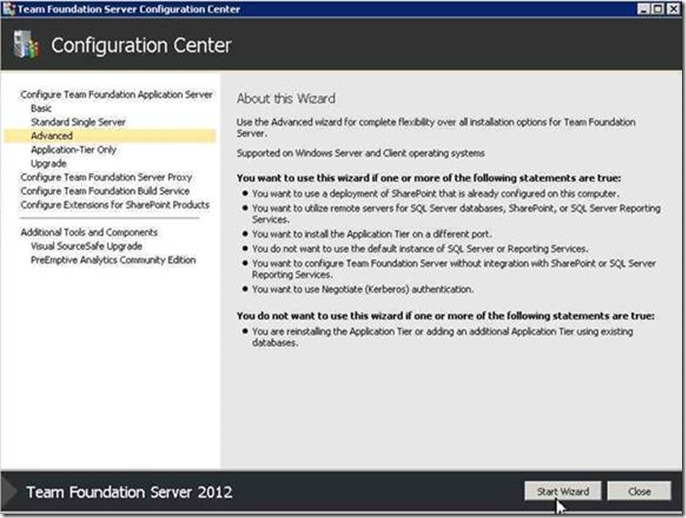
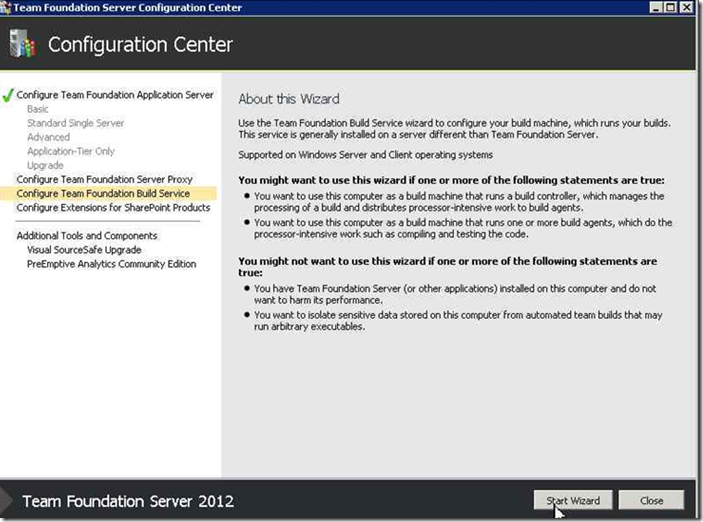
- In the Team Foundation Server Configuration tool, choose Advanced, and then choose Start Wizard.
The Advanced Configuration wizard appears.
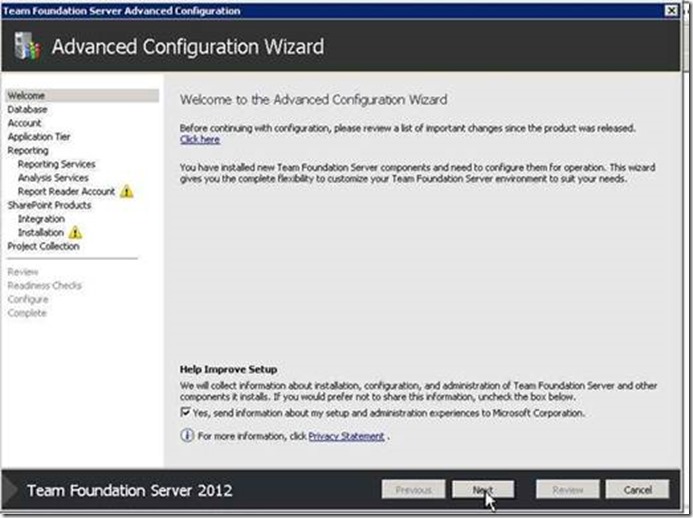
2. Read the Welcome screen, and then choose Next.
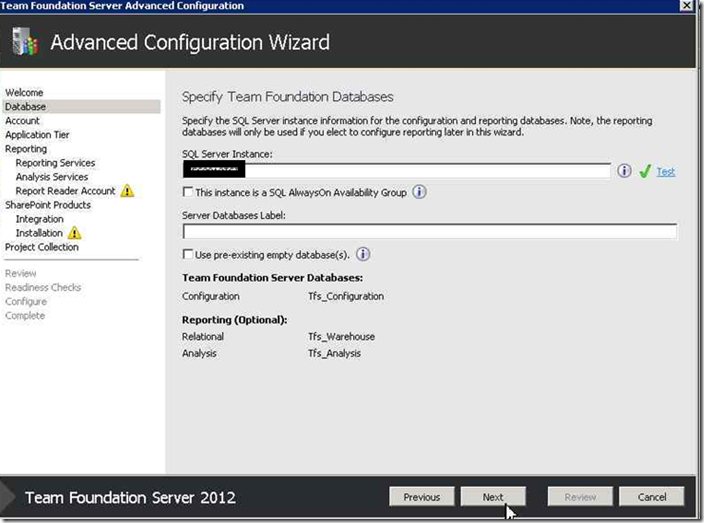
- In SQL Server Instance, type the name of the server that is running SQL Server or the named instance that will host the configuration databases, and choose Next.
4. Under Service Account, choose Use a system account to use a built-in account or Use a user account to use a domain or local account. If you are using a user account, you must type the password. To test the user account and password combination, you can optionally choose Test.
- Under Authentication Method, choose NTLM or Negotiate (Kerberos), and then choose Next.
- If you choose NTLM, NTLM authentication is used. This option is the default setting.
- If you choose Negotiate (Kerberos), Kerberos authentication is attempted first. If that attempt fails, NTLM authentication is used.
- Under Web Site, type a name in Web Site Name and a port number in Port. This is the name that appears in Internet Information Services (IIS) and the port number used to connect to Team Foundation Server.
The default values for Web Site are Team Foundation Server and 8080.
- Under IIS Virtual Directory, you can use the default value of tfs or optionally type a virtual directory name.
Under Web Site, note the Team Foundation Server site URL, which is dynamically assembled based on your input in Web Site and IIS Virtual Directory. Clients use this URL to connect to Team Foundation Server. Choose Next
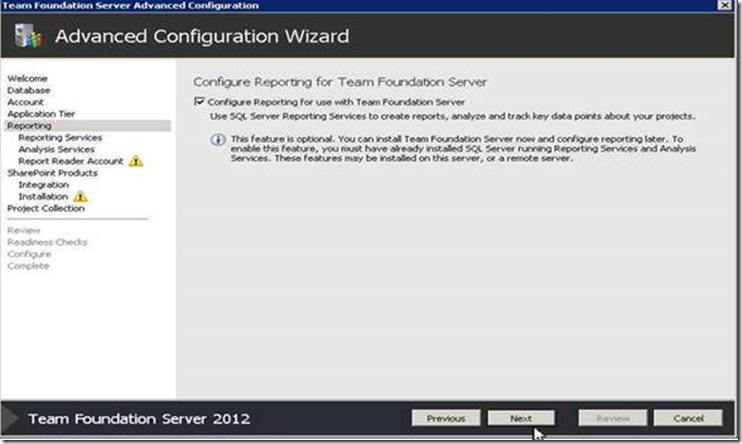
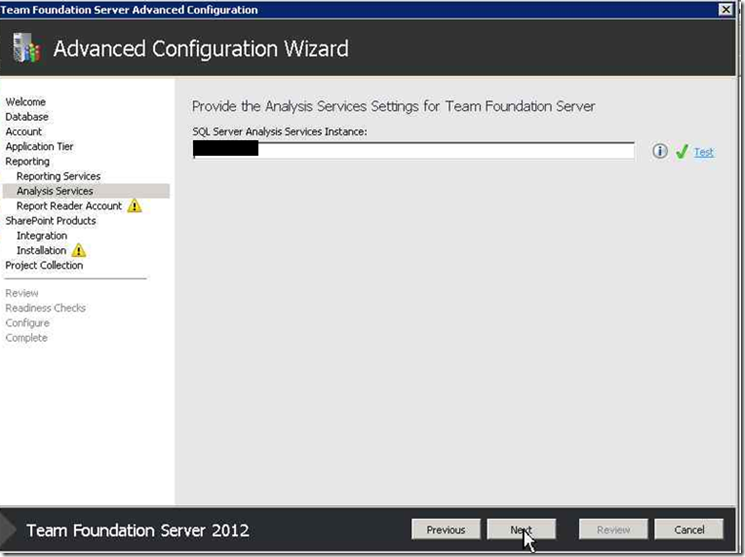
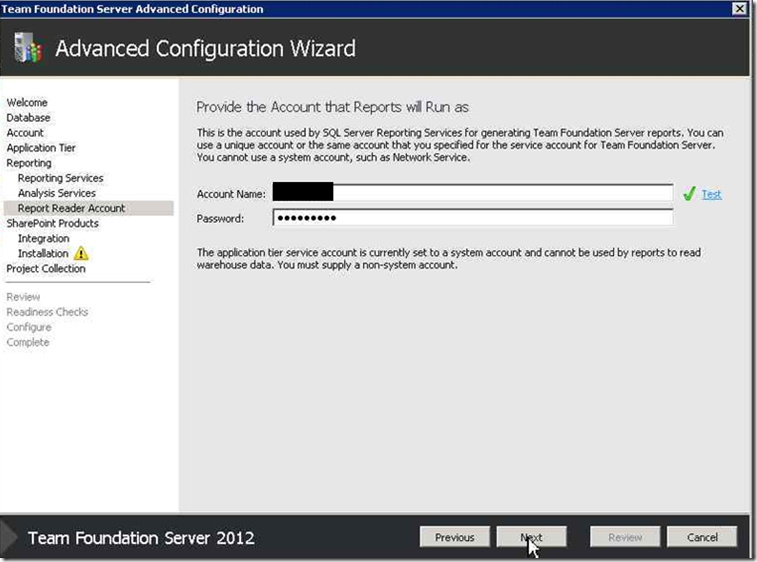
- Use the Configure Reporting for Team Foundation Server page to opt in or out of using reporting. Select the Configure Reporting for use with Team Foundation Server check box to use reporting, or clear the check box to skip reporting, and then choose Next.
If you specified a user account for the service account of Team Foundation Server in step 4, you must select the Use a different account than the Team Foundation Server service account for the report reader account check box to use a different account
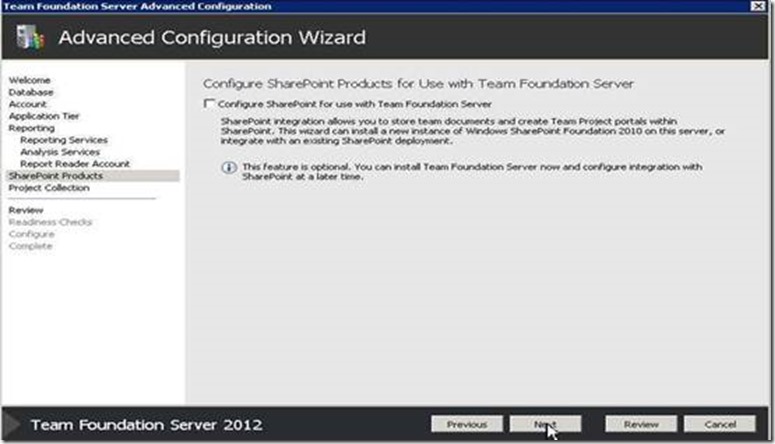
- Use the Configure SharePoint for Team Foundation Server page to opt in or out of using SharePoint Products. Clear the check box to skip SharePoint Products. Choose Next.
If you selected the check box to configure SharePoint Products, perform one of the following procedures:
- Install and configure SharePoint on this machine.
- Choose Install and configure SharePoint on this machine and choose Next.
- Choose the big Install SharePoint Foundation 2010 button. Once the install completes, choose Next.
- Type a user account and password for the service account forSharePoint Foundation 2010 (WSSSERVICE). If you specified a user account for the service account of Team Foundation Server in step 4, you must select the Use a different account than the Team Foundation Server service account for the SharePoint farm check box to use a different account.
- Choose Next.
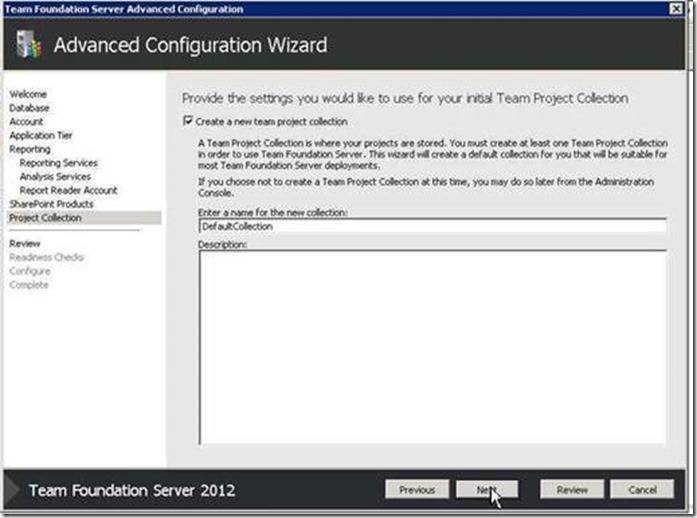
- Select the Create a new team project collection check box to create a collection, or clear that check box to skip that step.
- On the Review page, review the settings, and choose Next.
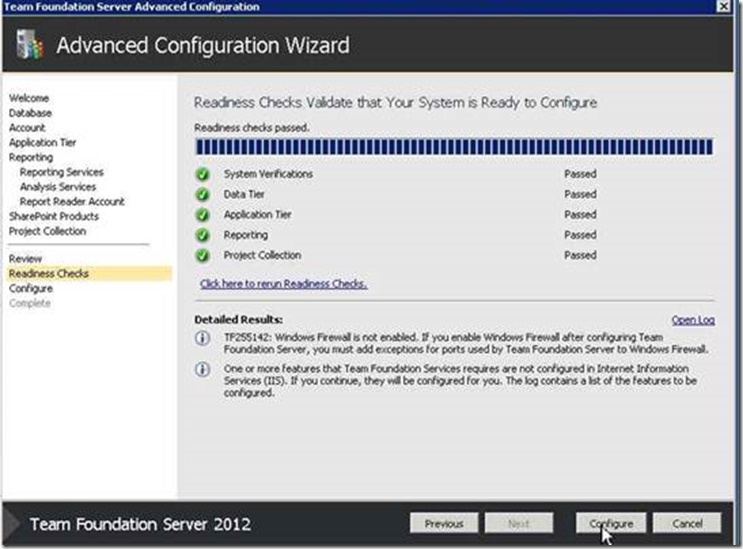
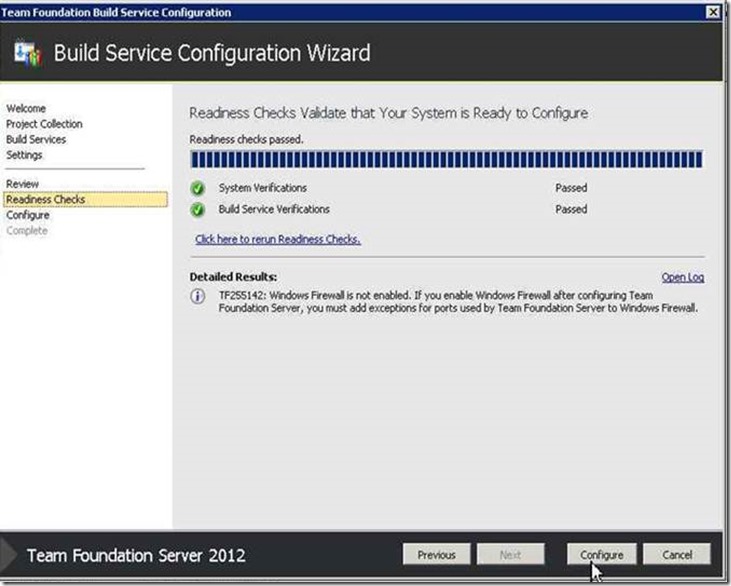
The wizard validates your configuration.
13. Choose Configure.
The wizard applies configuration settings. This process might take several minutes


![clip_image015[4] clip_image015[4]](https://gwb.blob.core.windows.net/gauravtfs/Windows-Live-Writer/464d72afe193_D06F/clip_image0154_thumb.png)
![clip_image016[4] clip_image016[4]](https://gwb.blob.core.windows.net/gauravtfs/Windows-Live-Writer/464d72afe193_D06F/clip_image0164_thumb.png)
![clip_image018[4] clip_image018[4]](https://gwb.blob.core.windows.net/gauravtfs/Windows-Live-Writer/464d72afe193_D06F/clip_image0184_thumb.jpg)
![clip_image019[4] clip_image019[4]](https://gwb.blob.core.windows.net/gauravtfs/Windows-Live-Writer/464d72afe193_D06F/clip_image0194_thumb.png)
![clip_image021[4] clip_image021[4]](https://gwb.blob.core.windows.net/gauravtfs/Windows-Live-Writer/464d72afe193_D06F/clip_image0214_thumb.jpg)
![clip_image024[4] clip_image024[4]](https://gwb.blob.core.windows.net/gauravtfs/Windows-Live-Writer/464d72afe193_D06F/clip_image0244_thumb.png)


![clip_image030[4] clip_image030[4]](https://gwb.blob.core.windows.net/gauravtfs/Windows-Live-Writer/464d72afe193_D06F/clip_image0304_thumb.jpg)


![clip_image046[4] clip_image046[4]](https://gwb.blob.core.windows.net/gauravtfs/Windows-Live-Writer/464d72afe193_D06F/clip_image0464_thumb.jpg)
![clip_image047[4] clip_image047[4]](https://gwb.blob.core.windows.net/gauravtfs/Windows-Live-Writer/464d72afe193_D06F/clip_image0474_thumb.png)
![clip_image064[4] clip_image064[4]](https://gwb.blob.core.windows.net/gauravtfs/Windows-Live-Writer/464d72afe193_D06F/clip_image0644_thumb.jpg)
