In this article I am describing how to configure Search in SharePoint 2010.
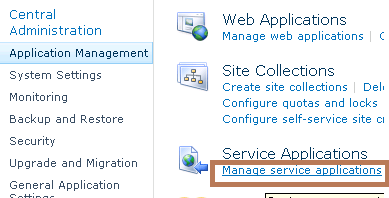
1. Go to SharePoint Central Administration.
2. Click on Application management then select Manage Service application.
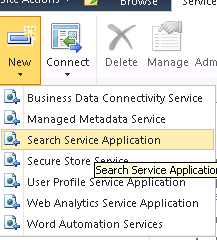
3. Click New and select Search Service Application
4. Give a name for your Service application.
5. Select Search Service account or register new Service account in the drop down.
6. Better create a new application pool for your Search service as shown below.
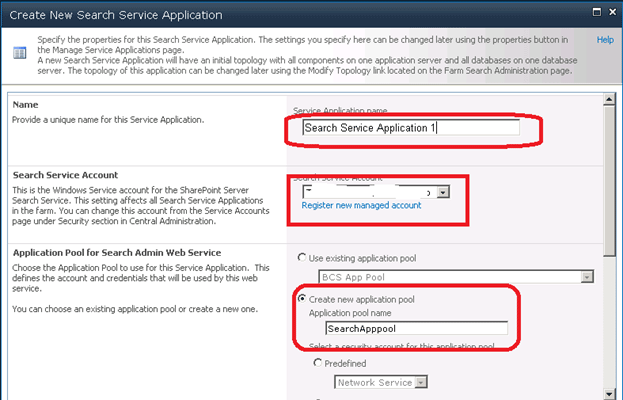
7. Once done Click OK.
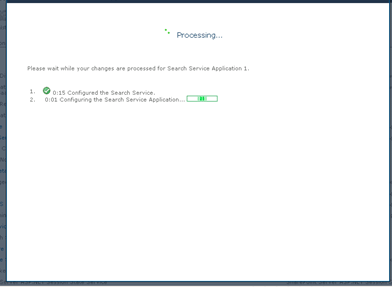
8. It will take some time to configure the service.
9. Once configured correctly you will see the service created like below.

10. Click on the Search Service Application 1 that we create now.
11. Select Content Source.
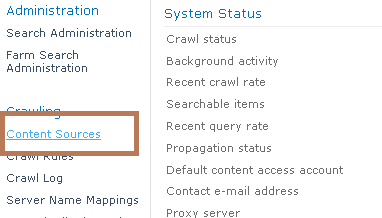
12. Click on the Local SharePoint Site.

13. Add the Web applications that you need to put in Search Services as shown below.
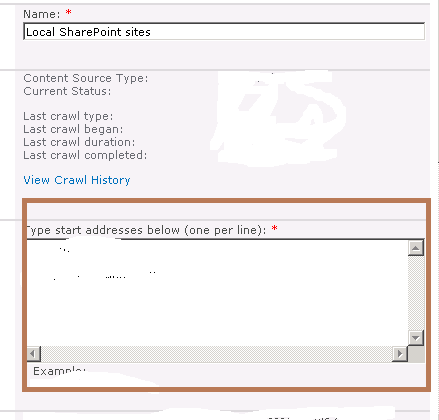
14. You have to configure Full and incremental crawl schedules in the preceding screen.
15. Now go back and start a Full crawl.
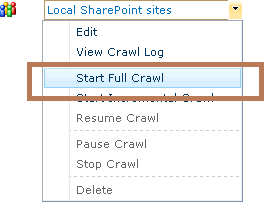
16. You will get the following screen.

17. Even though you have done all these steps you may get some error while searching "The search request was unable to connect to the Search Service".
18. To avoid this you have to perform the following steps.
19. Go to Application management and select Configure Application Association as shown below.

20. Click on your application.
21. From the "Edit the following group of connections" drop down select Custom.
22. Associate your search service with your web application.
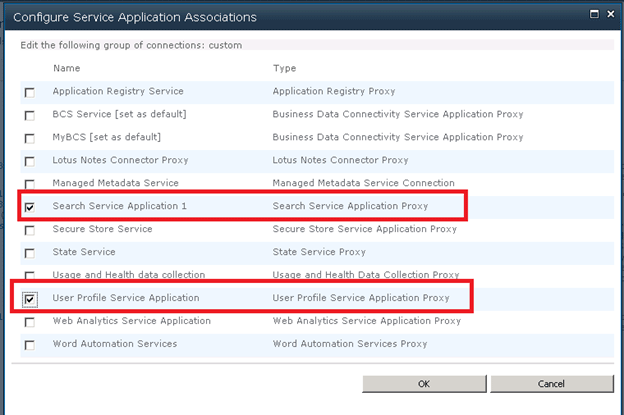
23. If you done this step you may have to start the crawl once again.
1. Go to SharePoint Central Administration.
2. Click on Application management then select Manage Service application.

3. Click New and select Search Service Application

4. Give a name for your Service application.
5. Select Search Service account or register new Service account in the drop down.
6. Better create a new application pool for your Search service as shown below.

7. Once done Click OK.

8. It will take some time to configure the service.
9. Once configured correctly you will see the service created like below.
10. Click on the Search Service Application 1 that we create now.
11. Select Content Source.

12. Click on the Local SharePoint Site.
13. Add the Web applications that you need to put in Search Services as shown below.

14. You have to configure Full and incremental crawl schedules in the preceding screen.
15. Now go back and start a Full crawl.

16. You will get the following screen.

17. Even though you have done all these steps you may get some error while searching "The search request was unable to connect to the Search Service".
18. To avoid this you have to perform the following steps.
19. Go to Application management and select Configure Application Association as shown below.

20. Click on your application.
21. From the "Edit the following group of connections" drop down select Custom.
22. Associate your search service with your web application.

23. If you done this step you may have to start the crawl once again.